Group work improves critical thinking, problem solving, adaptability, and communication.
You can create groups of students within your courses.
Research1 has shown students can benefit from group work in several ways:
- Students retain information longer than with other teaching methods.
- Perspectives from group members offer another opportunity to learn new material.
- Students have a positive feeling about the course material.
- Students who establish good relationships with their peers have a more positive learning experience.
- Successful group work leads to students feeling better about themselves.
- Students increase their social and communication skills.
- Students increase their critical thinking skills.
______________
Source: 1 "44 Benefits of Collaborative Learning." gdrc.org n.d. Web. 12 Nov. 2009.
Collaborative learning offers many benefits over traditional instruction. Studies show that when students work as a team, they develop positive attitudes, solve problems more effectively, and experience a greater sense of accomplishment.
You can organize students into groups so they can interact with each other and demonstrate their knowledge while they learn to appreciate the perspective of others.
You can create course groups one at a time or in sets.
Learn More
Manage Groups | Import Export Groups
Access course groups
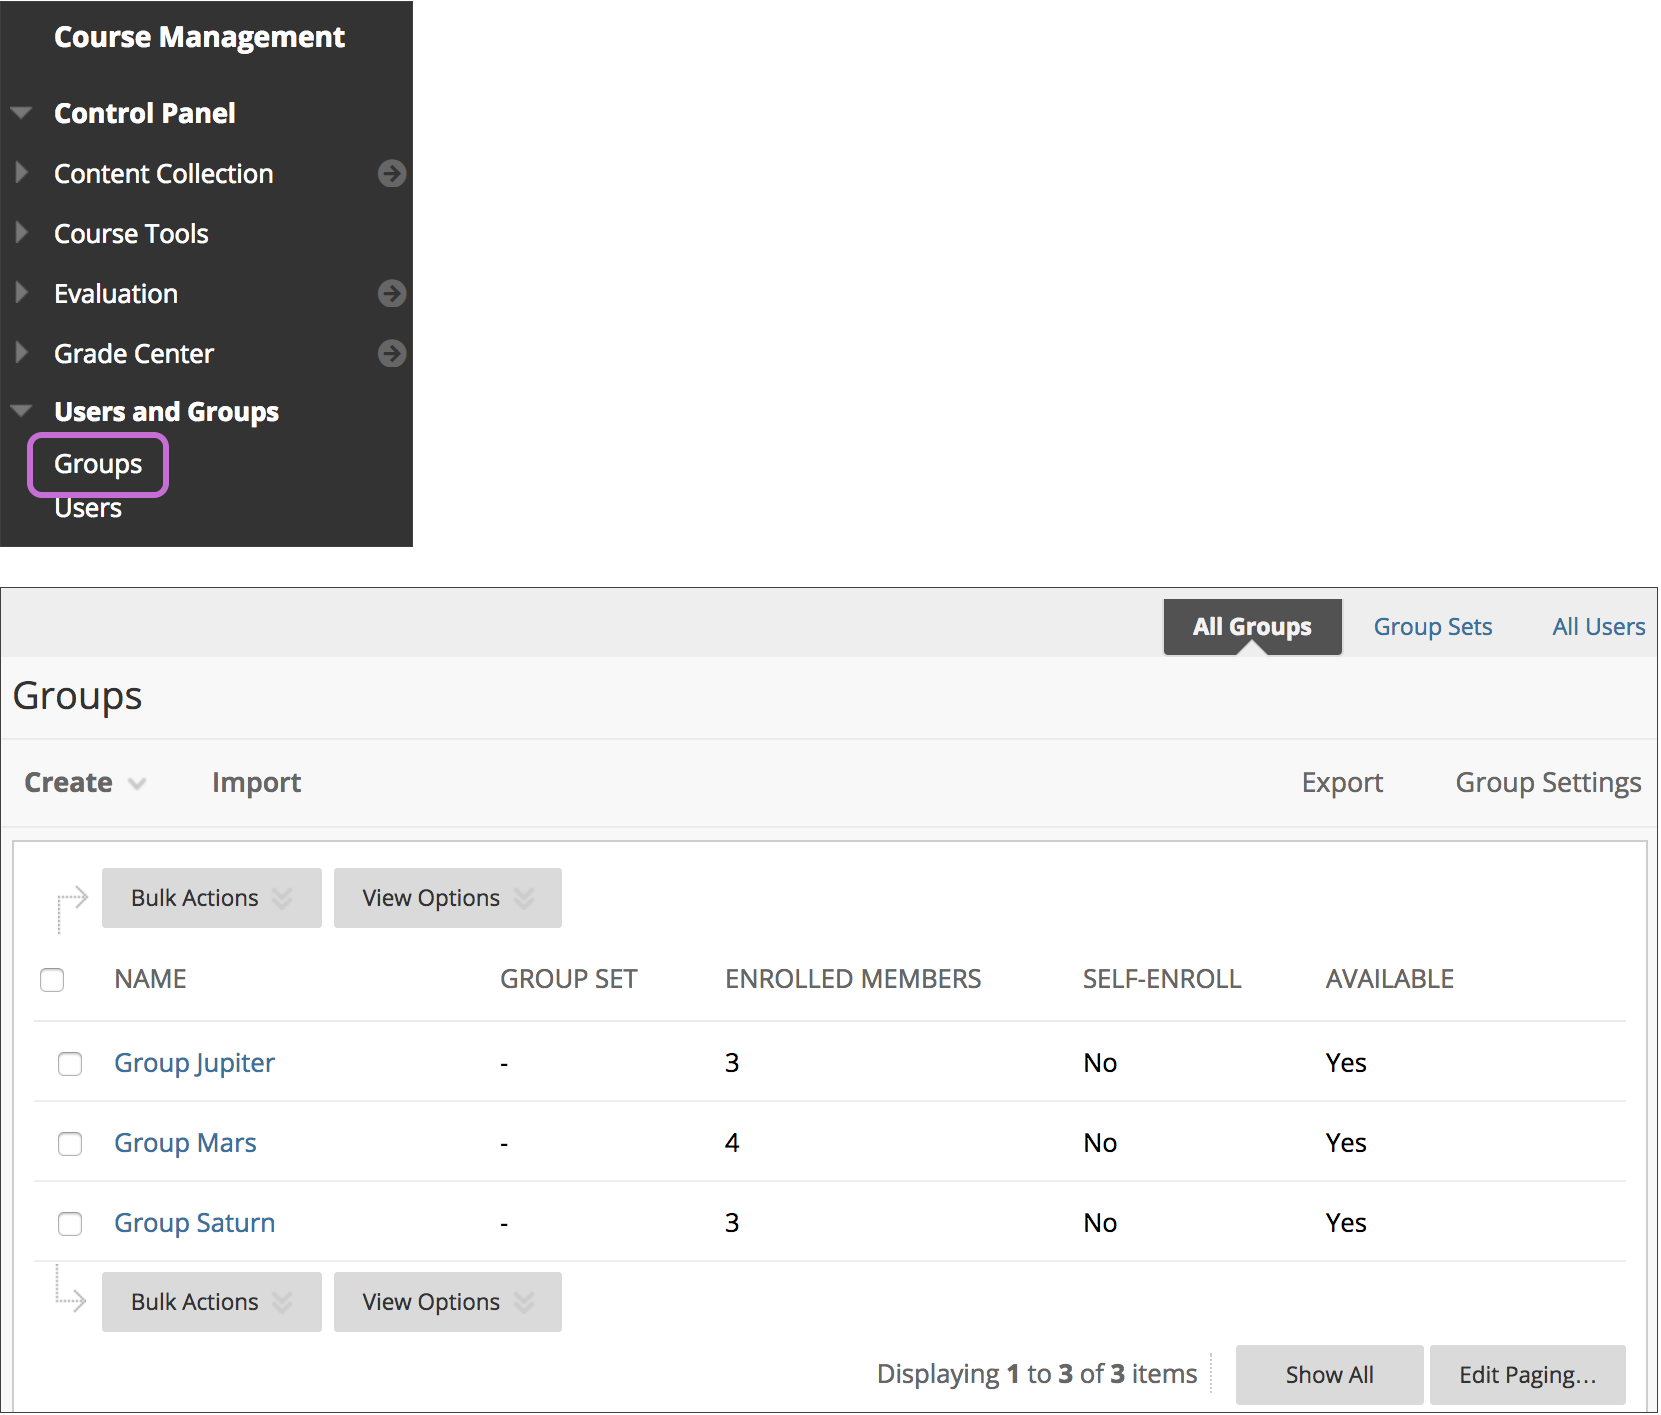
Each group has its own homepage with links to tools to help students collaborate. Only you and group members can access the group tools. In the Control Panel, expand the Users and Groups section and select Groups. On the Groups page, you can view and edit your existing groups, and create new groups and group sets.
Group enrollment methods
You can enroll students in groups in three ways. Students can't unenroll themselves from groups.
- Manual Enroll allows you to assign each student in your course to a group. Manual enrollment is available for both single groups and group sets.
- Random Enroll is available for group sets only. Random enrollment automatically distributes students into groups based on your settings for maximum members per group or total number of groups. Random distribution applies only to students who are currently enrolled in your course. You can enroll additional students manually.
- Self-Enroll allows students to add themselves to a group with a sign-up sheet. Self-enrollment is an option available for both single groups and group sets.
More on choosing a group enrollment method
Student access to their course groups
Students can access groups in two ways:
- In a new course, select the Groups link on the course menu.
- In the course menu, go to Tools > Groups.
More on the best ways to present groups
Create a single course group
- On the Groups page, select Create.
- In the Single Group list, select Self-Enroll or Manual Enroll.
- Type a name and optional description. Make the group visible to students.
- Select the check boxes for the course tools you want to make available to the group.
- If you want to grade student submissions for blogs, wikis, and journals, select the Grade option and type Points possible.
- Select the check box for Allow Personalization to let students add personal modules to the group homepage. Modules are only visible to the group member who added them.
- Optionally, select the check box to create a smart view for this group.
Enroll students in a course group
- If you chose Self-Enroll, type a name and provide instructions. You might tell students that they can't unenroll
themselves from groups. Type the Maximum Number of Members and select any other options you want to include.
-OR-
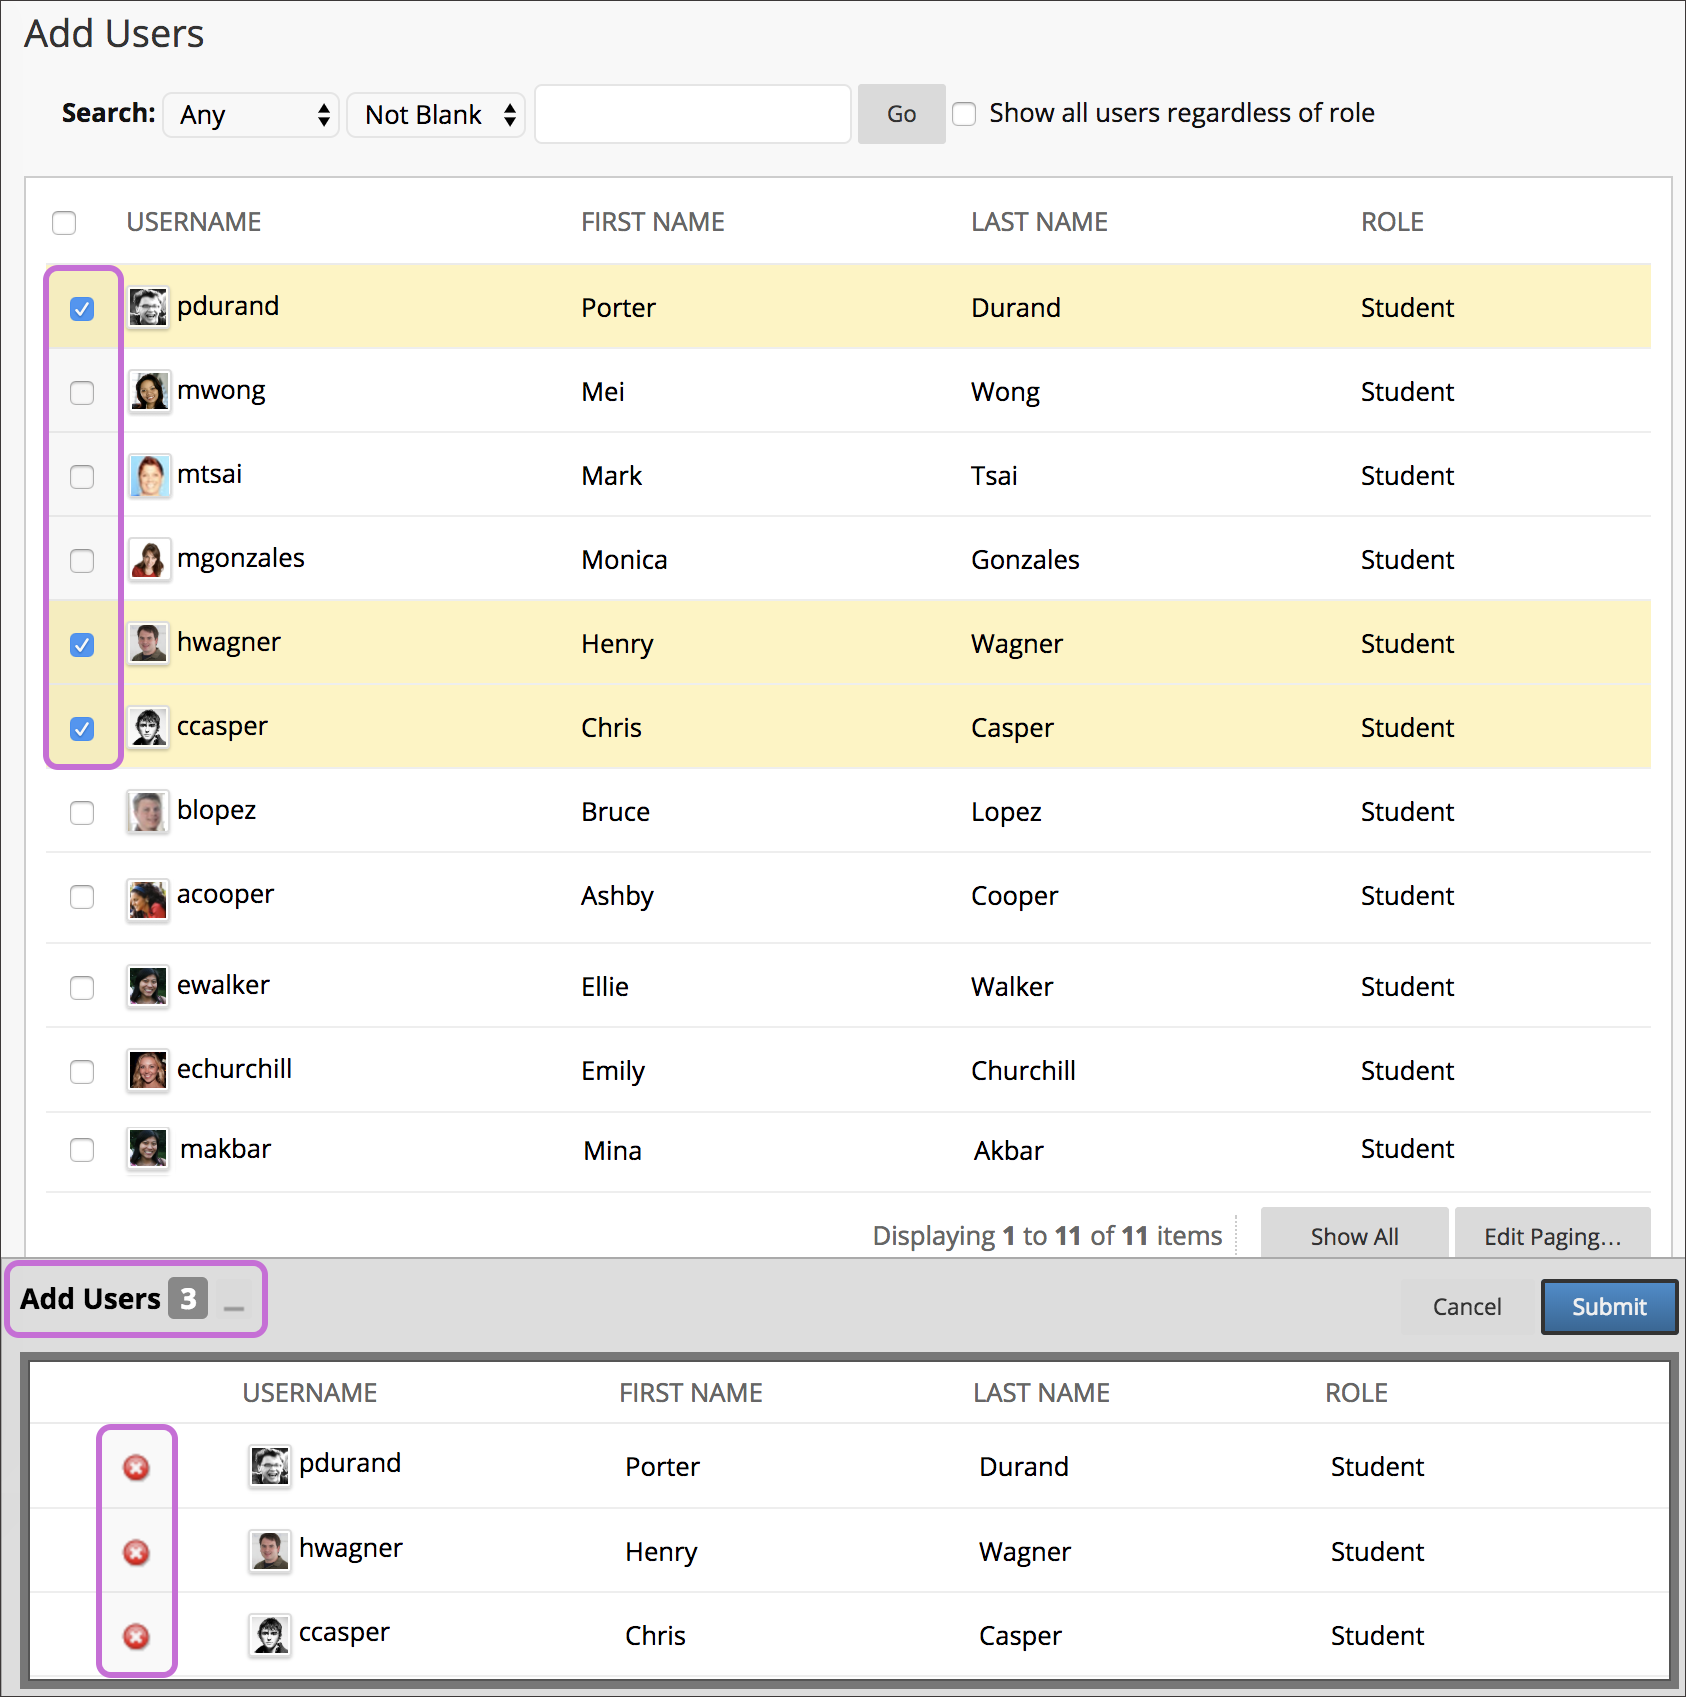
If you chose Manual Enroll, search for and select students from the Add Users pop-up window.
Your selected group members appear in the bottom area with a number showing the total count. Select the Show List icon, represented by a full square, to open the Add Users area to view your selections. To remove a user, select the X next to their name.
- Select Submit.
The newly created group appears on the Groups listing page.
Create a group set
- On the Groups page, select Create.
- In the Group Set list, select Self-Enroll, Manual Enroll, or Random Enroll.
Use the same steps as when you create a single group. Then, based on the enrollment option you choose, you can choose from these options:
- Self-Enroll: Type a name and instructions for the group. Enter the Maximum Number of Members and select any other options you want to include.
- Random Enroll: Type the Number of Students per Group or the Number of Groups you want to create. Select an option to Determine how to enroll any remaining members in the groups.
- Manual Enroll: Type the Number of Groups to create. On the next page, select Add Users for each group to make your selections.
Your selected group members appear in the bottom area with a number showing the total count. Select the Show List icon, represented by a full square, to open the Add Users area to view your selections. To remove a user, select the X next to their name.
Disabled users are counted in the overall group enrollment total until the course membership or users are purged.
Remove a group member
You can remove members from a course group.
Only course instructors and administrators can remove group members. Students can't remove themselves from a group or other students from student-created groups.
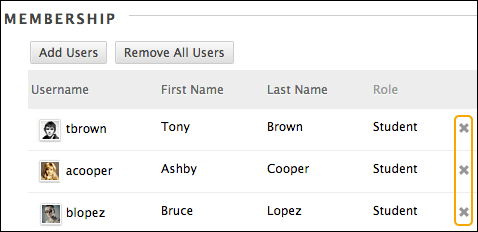
- On the Groups page, select Edit Group in the group's menu.
- On the Edit Group page, select the X in a member's row to remove the user from the group. Select Remove All Users to delete all members from a group.
- Select Submit.
The group member is now removed from the group. To verify that a user has been removed, go to the group homepage to check the list of members.
More on managing and deleting groups
Email a course group
You can use the group email tool to efficiently communicate with other members or the group as a whole. When you get ready to send a message, the tool automatically populates the recipient list with group members so you can quickly select all or some of them. The email message is sent to recipients' external email addresses. Blackboard Learn doesn't keep a record of these email messages.
If groups prefer to keep communication within their course, they can use course messages, the Blackboard Learn internal mail tool. Because course messages aren't available as a group tool, students need to select recipients from the list of all course members. A record of all sent messages is stored in the course messages tool.
More about using email in your course
Present groups to students
The way students access groups depends on how you set up your course. You can use three options for to set up groups to achieve different learning objectives.
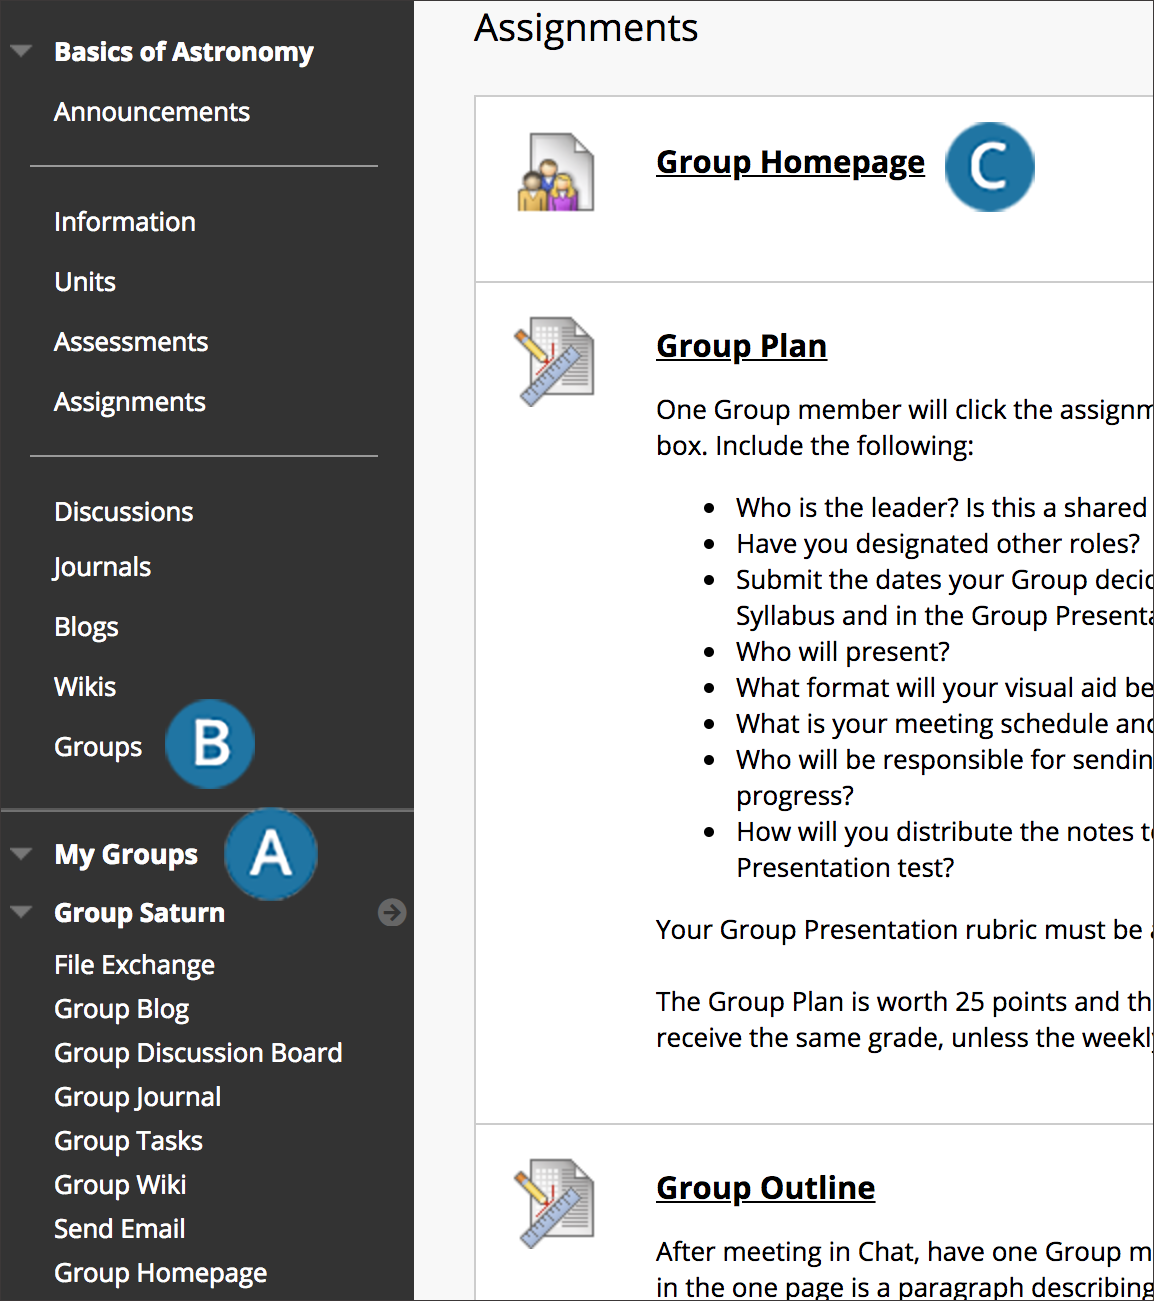
Option A: My Groups
What it looks like:
Each student's groups appear by default in My Groups.
How it works:
After you create groups and add users, the groups are available to enrolled members in My Groups where users can expand each group name for quick access to its tools. Because My Groups is populated automatically when students are added to groups, this option is the easiest to implement. Select the arrow to expand the group homepage into the content frame.
Option B: Course menu link
What it looks like:
A course menu link to the Groups listing page displays all groups a student is enrolled in and available sign-up sheets.
How it works:
Because My Groups doesn't list sign-up sheets, create a link to the Groups listing page if you want to use self-enroll groups. A link to groups in the course menu makes it easy and convenient for students. Use the course menu's Add Menu Item list and create a tool link or a course link. Then, select the Groups listing page in the pop-up course map.
Option C: Provide links in a course area
What it looks like:
A link to the Groups listing page, a group homepage, or a sign-up sheet appears in a content area, folder, learning module, or lesson plan in close proximity to related content.
How it works:
Create groups with the groups tool. Next, go to the course area where you want to add the group link. Access the Toolsmenu and select Groups. Make your selection on the Create Link: Group page.